
Tips and practice
Five composition habits that improve photographs
Composition is less about applying rules and more about deciding what deserves attention. These five habits slow the process down just enough to make a photograph feel deliberate.

The short version
- Decide what the photograph is about before pressing the shutter.
- Check the background and every edge of the frame.
- Move your feet and camera height before reaching for the zoom.
- Use colour, scale and spacing to suggest a story without explaining it.
1. Name the subject
Before taking the picture, finish this sentence: “This photograph is about…” If the answer is unclear, the frame may be trying to say too much. A subject can be a person, a relationship, a pattern, a colour or even a patch of light—it does not have to be one object in the centre.
Once you know the subject, ask whether every prominent element supports it. Removing one distraction often improves the picture more than adding anything new.
2. Read the background before the subject
Our eyes concentrate on a person or object and quietly ignore the clutter around it. The camera records everything with equal enthusiasm: bright signs, branches appearing from heads, bins and patches of sky at the edge.
Pause and scan the background. A small step left or right, a lower viewpoint or waiting two seconds can create separation without any editing.
3. Patrol the edges
The edge of the frame is where accidental objects enter and important shapes get awkwardly cut. Run your eye around all four sides before you take the photograph. Decide whether to include an object properly or exclude it completely.
This habit also helps with horizons. A level horizon is not compulsory, but an almost-level one often looks accidental.
4. Use placement to create emphasis
The rule of thirds is a useful prompt, not a law. Off-centre placement can create space for a person to look or move into. Central placement can feel calm, formal or powerful. Symmetry can be the whole point of an image.
Choose the placement because it supports the subject. If you cannot explain why the frame works, try one centred version and one off-centre version, then compare them later.
5. Change distance and height
Zooming changes the framing, but moving changes the relationship between foreground and background. Get closer for intimacy and detail. Step back to show context. Lower the camera to give foreground objects weight, or raise it to simplify overlapping shapes.
When it is safe, make the obvious standing-height photograph and then refuse to take the next frame from the same place.
A good subject may already be beside you
You do not need to travel far to find a worthwhile subject. This photograph begins with something completely familiar: a cat close to home. Bringing the camera close and low changes that familiar face into an arrangement of lines, shapes and tones.
The visible eye near the lower-right corner anchors the frame. The whiskers travel out across the dark negative space, while black and white reduces competing colour and makes texture more important. A small shift of the camera would change where the eye sits, how the whiskers cross the frame and how much empty space surrounds them.
Once you notice a subject, move yourself. Go lower or higher, step closer or farther away, and shift left or right—even a few centimetres can separate shapes or create a stronger line. The first view confirms that the subject exists; the next views discover what the photograph could become.
A simple subject can create strong structure
While walking through a forest, Emanuele noticed this tree and then walked around it looking for the clearest relationship between its parts. The subject itself was not complicated. The photograph appeared when he looked along the cut trunk and saw the branches radiating like the spokes of a bicycle wheel.
The cut end becomes the hub and gives the eye somewhere to settle. The surrounding branches pull attention both towards and away from that centre. Here, a central composition is not a default choice: it supports the radial pattern. Filling the frame removes most of the ordinary forest context and makes shape, repetition and texture the subject.
The photograph later became a winning image in an Italian photography competition. Its strength does not come from an exotic location or a complicated event; it comes from recognising a simple visual idea and moving until the viewpoint expressed it clearly.

Let the viewer discover a second story
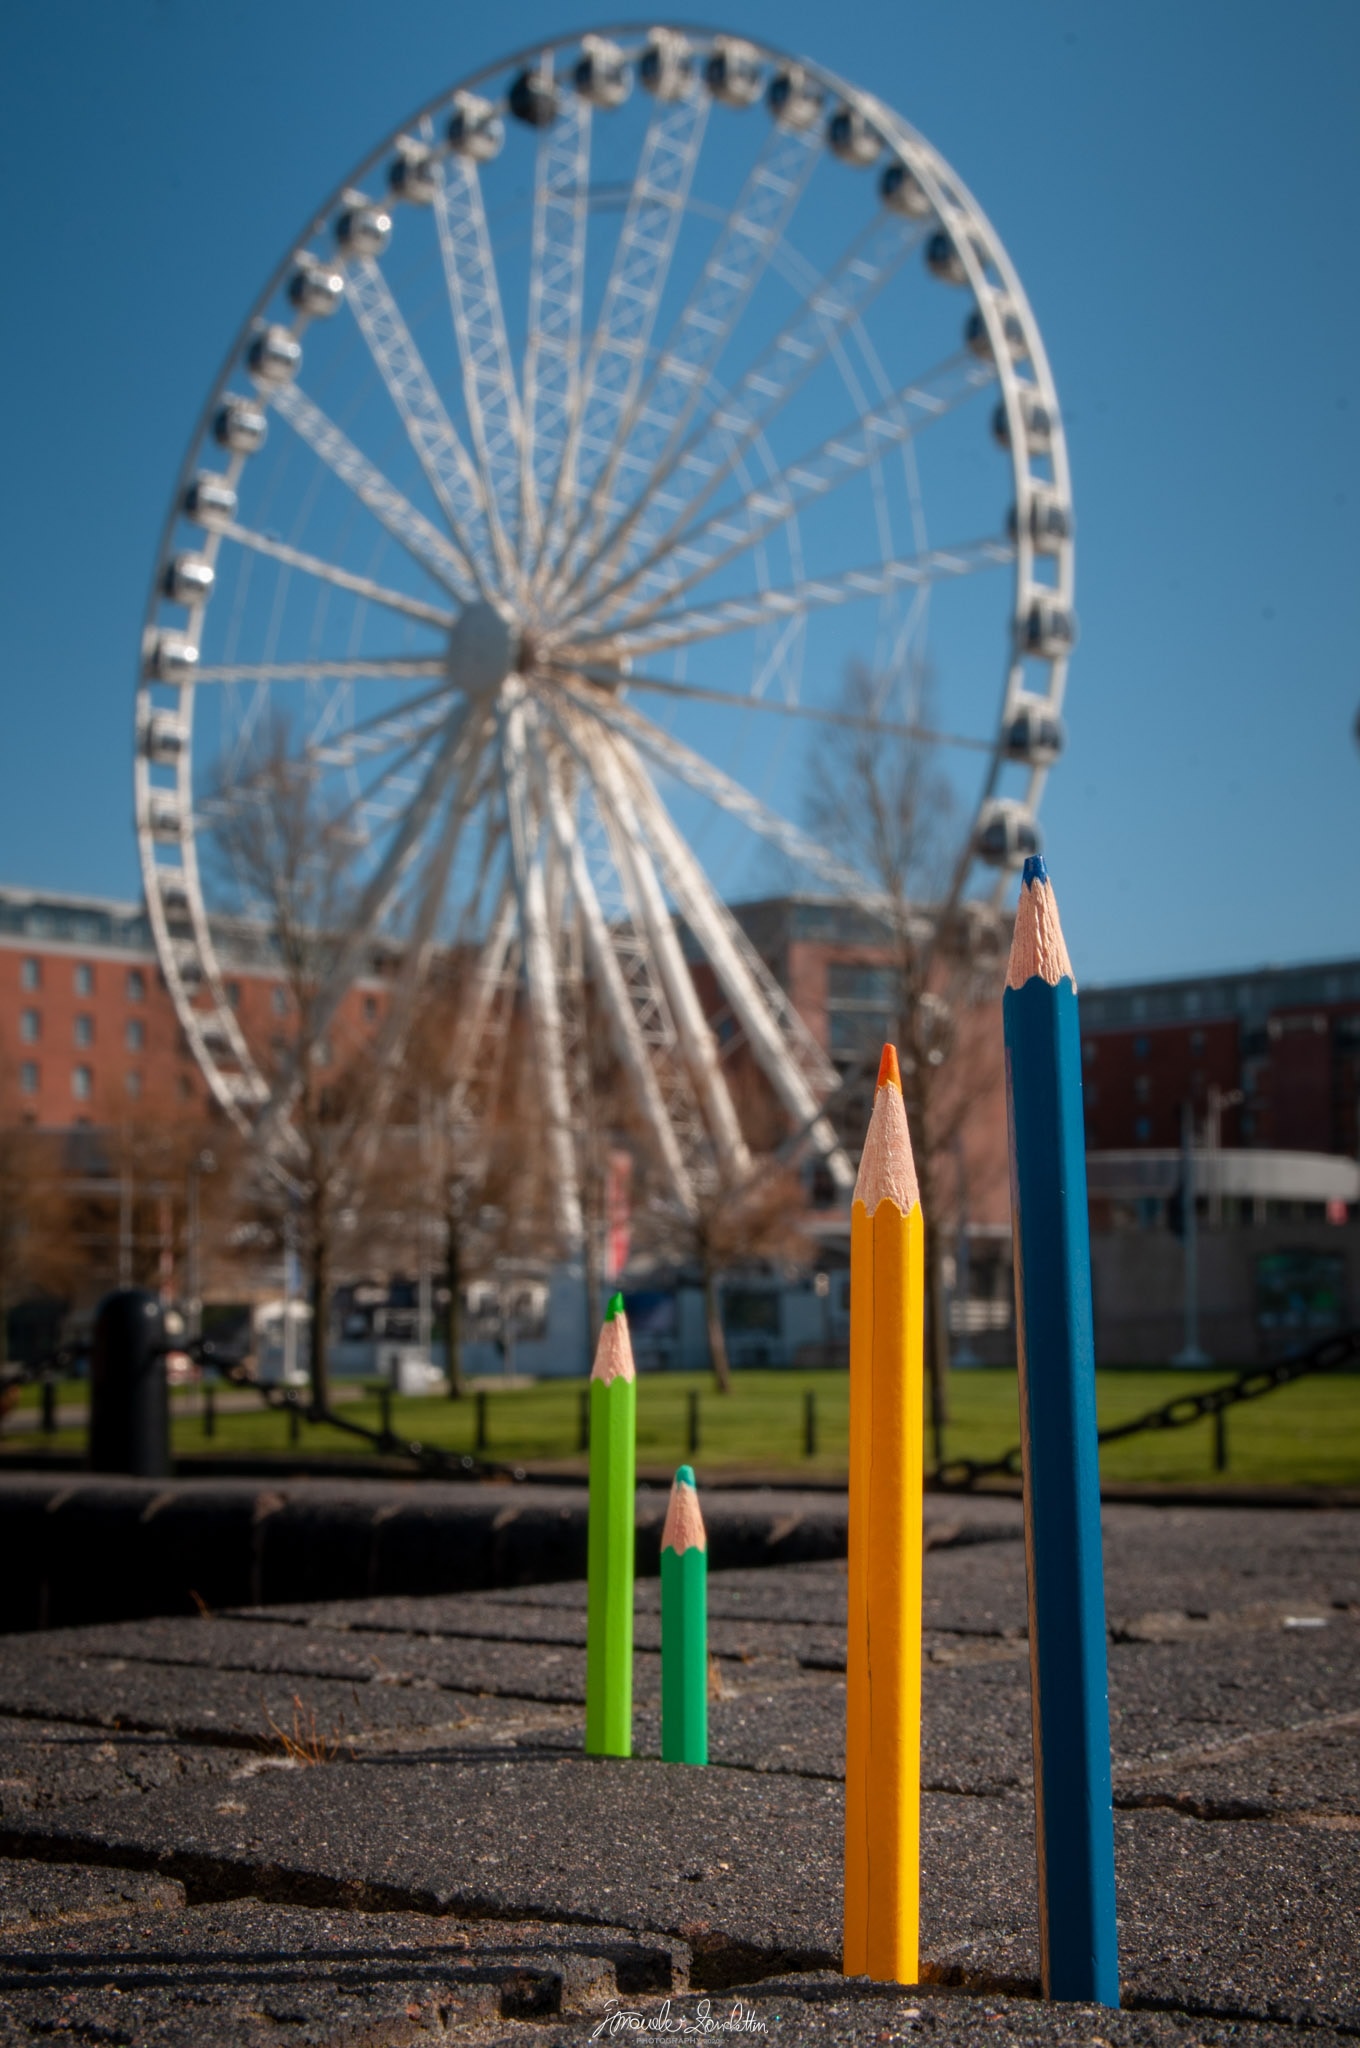
Imagine four members of a colour family arriving on Liverpool’s waterfront. The taller pair stride towards the wheel while two smaller travellers pause behind, taking in their first view of the city. They are pencils planted in paving, yet height, spacing and the Liverpool landmark give them a destination, different roles and a shared moment.
The photograph does not explain every relationship immediately. It first works through colour, scale and place, then rewards a slower look with another connection. That delayed recognition can hold attention: “Nice… wait… what?” becomes part of the viewing experience.
Visual storytelling can begin with ordinary objects. Give them roles through position, size, direction or colour, and include just enough context to suggest where they are or what they are doing. A title can open the door without closing the interpretation.
Prepare the frame, then wait for the moment
Emanuele calls this photograph “The Last Kiss”. Its meaning depends on a brief relationship: the final edge of the sun appears to touch the line of the hill. A frame made slightly earlier would leave more space between them; one made later would lose the sun completely.
Waiting for the right moment does not mean relying on a single attempt. Start with a test photograph. Measure the light, protect the important highlights, check focus and settle the composition while there is still time to think. Then make a short sequence before, during and after the moment you expect.
Review the neighbouring frames together. Look at the size and position of the remaining sun, its relationship with the diagonal ridge, and the balance between the warm sky and dark land. Timing becomes easier to understand when you can see exactly what changed from one frame to the next.

Photograph first, then learn from the differences
When you are still unsure, take a short sequence rather than waiting for certainty. Make one frame close, one wider, one low, one high, one with generous negative space and one that fills the frame. Do not delete anything until you can see the photographs together.
Ask which elements support the better view. Is the subject clearer? Did the background become simpler? Do the lines lead towards something important? Are the edges deliberate? Pick the strongest frame and explain in one sentence which change improved it. The purpose is not to collect six keepers; it is to recognise the decision that changed the result.
Readers’ thoughts
Approved comments only · Shared across the English and Italian versions