
Lightroom before & after
Recovering a difficult exposure in Lightroom
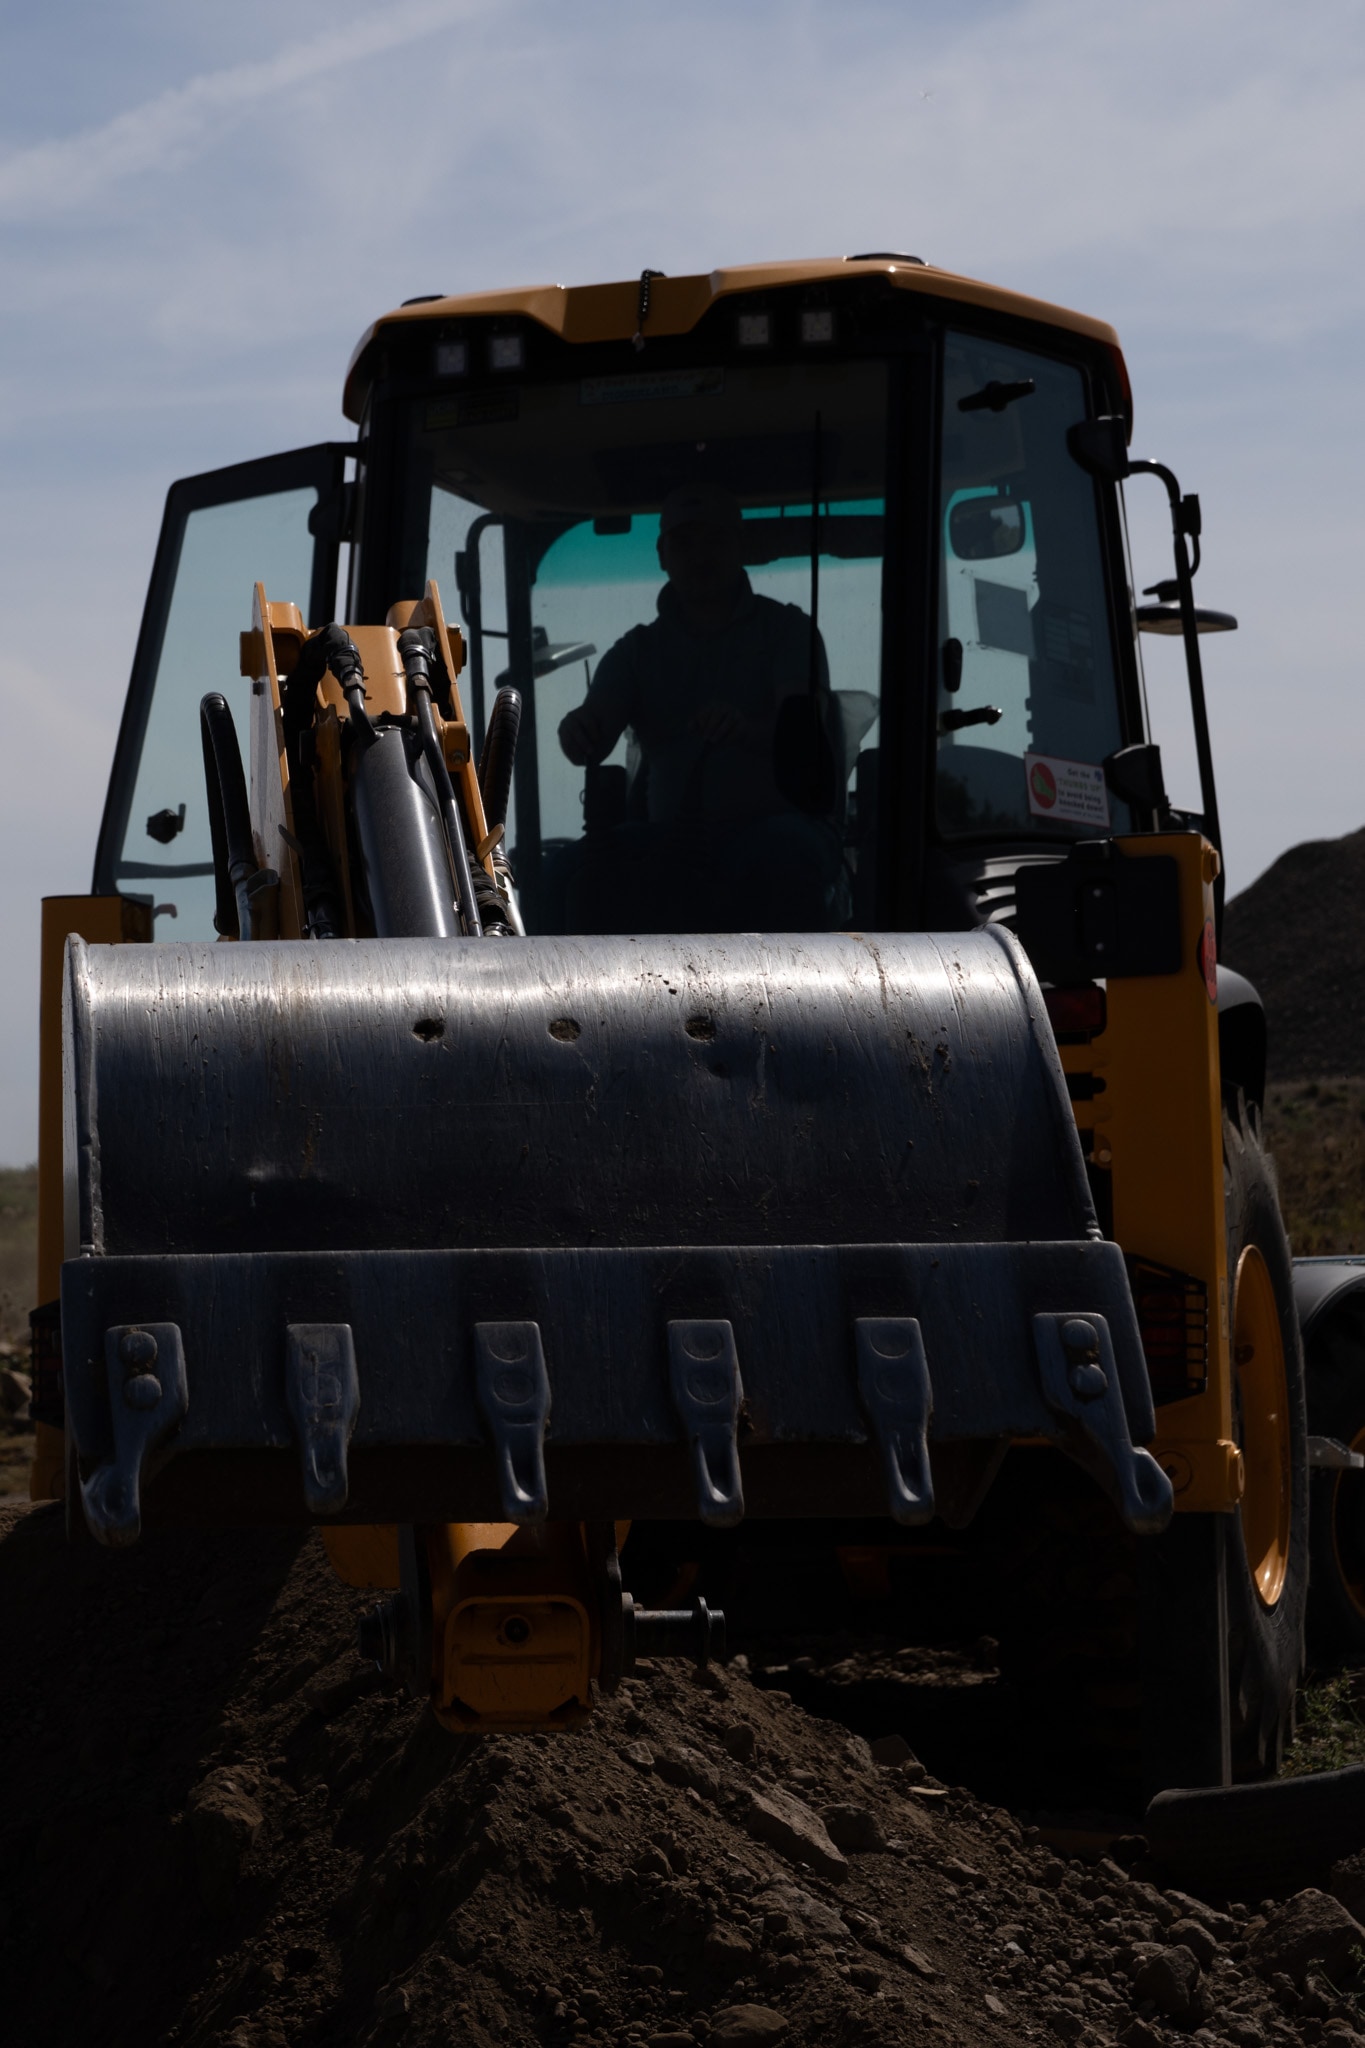
A bright sky and a dark machine created more contrast than the first export could comfortably show. Drag the vertical divider to compare Emanuele’s original-looking export with the finished photograph, then explore the decisions behind the edit.



The short version
- The bright sky and shaded machine created a high-contrast exposure, leaving the main subject too dark in the first version.
- The finished edit reveals useful shadow information while keeping texture and tone in the sky.
- A believable result comes from balancing global corrections with selective adjustments—not simply brightening everything.
What was wrong with the first version?
The first version protects the pale sky reasonably well, but the loader carries most of the picture’s visual weight and is too dark. The driver is almost a silhouette, the yellow bodywork loses its colour, and the bucket and soil merge into large areas of near-black. The viewer can recognise the subject, but cannot explore it.
This is not necessarily a failed capture. Photographing a shaded subject against a bright sky asks the camera to hold a wide range of tones. Preserving the highlights may leave the foreground dark, but a well-exposed digital file can still contain enough shadow information to develop later.
What changed in the finished photograph?
The strongest change is in the shadows and darker midtones. Detail returns to the cab, the person becomes readable, the hydraulic components separate from one another, and the texture of the bucket and ground becomes part of the image. The loader’s yellow paint also regains warmth and presence.
The sky remains controlled rather than turning white. That separation matters: raising the entire exposure until the vehicle looks right could make the sky weak or clipped. The finished version suggests a combination of broad tonal recovery and more selective work on the machine and foreground.
Contrast has not been removed completely. Deep tones remain beneath the bucket, around the tyres and inside the cab, which gives the machine weight. The edit opens the shadows; it does not flatten every dark area.
A sensible Lightroom workflow for a file like this
Start with the whole photograph before reaching for masks. Choose a camera profile, correct white balance, then set overall exposure while watching the sky. Reduce highlights if they are becoming distracting and lift shadows until the main shapes separate. Set white and black points afterwards so the image still has a full tonal range.
Once the global balance is close, use masks only where they solve a visible problem. A Subject or Object mask, refined with a brush, can open the loader and driver. A separate sky mask can hold brightness and add gentle definition. The soil may need a smaller lift than the metal bucket, so treating every dark area identically is rarely ideal.
- Correct profile and white balance before judging colour.
- Set exposure for the overall frame while protecting important highlights.
- Recover shadows, then restore black and white points for depth.
- Mask the machine, cab or ground only when the global adjustment cannot balance them.
- Add texture or clarity sparingly to the worn metal and soil.
- Finish with sharpening and noise reduction at 100% view.
Colour and detail: enough, but not too much
The yellow-orange paint is an important visual anchor. After the tonal correction, modest vibrance or targeted orange and yellow adjustments can help it separate from the cool glass and sky. Pushing saturation too far would make the vehicle look artificial and exaggerate colour noise in the recovered shadows.
Texture can suit the scratched bucket, hydraulic parts and earth, but it should not be applied indiscriminately. Extra clarity on the sky or the driver’s face can look harsh. Local tools are useful precisely because different surfaces need different treatment.
Warning signs when recovering deep shadows
Large shadow lifts can reveal noise, colour blotches and reduced detail. Inspect the cab and underside of the machine at 100%, but also return to a normal viewing size. A technically noisy area may not be distracting in the finished photograph.
- Grey, washed-out blacks that remove the machine’s weight.
- Bright halos around the roof, bucket or hydraulic arms.
- A sky that looks darker at the edges of a mask.
- Yellow paint that becomes fluorescent or loses surface variation.
- Heavy noise reduction that makes the driver and metal look waxy.
Try the same method on one of your photographs
Choose a RAW file with a bright background and a darker subject. Make a virtual copy. On the first version, use only the global Basic controls. On the second, stop the global correction earlier and finish with one mask for the subject and one for the background.
Compare the two at normal size. Ask which version directs attention more clearly, retains believable contrast and shows fewer halos or noisy patches. The aim is not to maximise visible detail everywhere; it is to reveal the detail that helps the photograph.
Readers’ thoughts
Approved comments only · Shared across the English and Italian versions